|
|
|
Catepillar Tracks
This is a brief tutorial
on making catepillar tracks without using path deform. I assume medium knowledge of 3dsmax, ie you
sould know how to assign controllers, use trackview and the motion pannel. As a note this tutorial relies HEAVILY on
MAX Script, although is is not necessary to be familiar with it.
NOTE: Where it says in
the tut ‘type in to the listener…’ is it also possible to cut and paste into a
new script and evaluate.
Do to this press f11 (the
listener pops up), go to file->new script, and paste into this window, then
click on file->evaluate all
To Start Off:
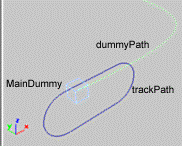
1. Make a path for the
tracks to follow and call it trackPath
2. Make a dummy
everything will be linked to, call it mainDummy
3. Made a path for the
dummy, called dummyPath
4. Put a path controller
on the dummy and pick dummyPath as the path
Link trackPath the to mainDummy, also make
sure to check the constant velocity and follow tick-boxes in the controller rollout.

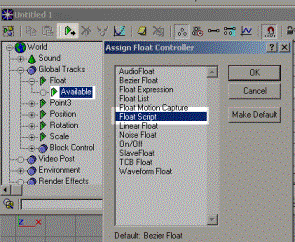
5. Go to the trackview
editorà global tracksà floatà available
and asign a float_script
controller, right click
on the new controller and select properties.
A window should pop up,
type in the following script and then click evaluate.
$maindummy.pos.controller.percent*(curvelength
$dummypath)/((curvelength $trackPath)/100.0)
Explaination of above code
What the above bit does is works out where the dummy is as a length then divides the number by the length of the track path. For example, if the dummy path was 1000 units and the track path was 50 units then the tracks would do 20 revolutions.

6. Open up the listener
(f11) and type in:
len=curvelength $trackPath
num=15
twidth=len/num
PS you can – make num the number of tracks you want, I chose 15
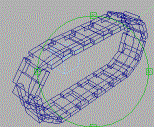
7. make a track object
the correct size (twidth) and array it in one axis the required number, using
twidth as the offset value.

make sure that all the
pivot points are aligned and unified.
8. select all the new
track objects and type the following into the listener:
trackObA=selection as array
9. Now we want to add a path controller for the position, and
a float_script controller for the percent.
Type the following into the listener
for i = 1 to trackObA.count do
(
trackObA[i].name=(”trackA”+(i as string))
trackObA[i].pos.controller=(path
path:$trackPath constantvel:true follow:true)
trackObA[i].pos.controller.percent.controller=float_script()
offset= ((i-1)*twidth/len)
trackObA[i].pos.controller.percent.controller.script=("trackviewnodes[1][1][1].value+"+(offset
as string))
)
A break down of the above code:
The first line sets the name of each track object plus a number, eg TrackA23
The next line makes the position controller a path type (like you would do in the motion tab) and sets up some values for it, ie, what path to follow, it also checks some tick boxes.
The next line make the percent controller a float_script, (you could also do this in the trackview editor)
The last two lines, set up the script for the percent.
Finally the loop goes through every track object in turn, (imagine having to do that by hand)
10. You should notice
that the track objects have jumped to the trackpath, if you press play the
tracks should move properly.

11.all that remains is to
make a second set of tracks, luckily most of the work is already done.
12. Shift copy trackPath
and drag it so it is parallel to the first trackpath, link the new path to
mainDummy
13. type the following
into the listener, select trackObA
14. shift copy the
selection to beside the second trackpath
15. type the following
into the listener (DONOT deselect objects)
16. trackObB=selection
as array
for i = 1 to trackObB.count do
(
trackObB[i].pos.controller.path=$trackPath01
trackObB.name=(”TrackB”+ (i as string))
)
17. That’s it. You could add wheels to the tracks and set up a float script for the y rotation you would use,
($maindummy.pos.controller.percent*(curvelength $dummypath)/$wheel01.radius /100.0)
assuming the wheel was called wheel01.
However if the wheel was not a simple cylnder, perhaps a lathed line or something you could type in the listener, global persistent rad=(wheel01.max-wheel01.min).z/2. then replace the $wheel01.radius with rad in the float_script controller. The global persistent part, makes the variable save with the scene.
Also you can also make trackObA , trackObB, len, twidth & num
all global persistent, you might want to do this if you ever have to do the
same operation on all of your track objects.
To do this just type in,
Persistent global <variable name>
Any Questions Email: rrjameson@yahoo.co.uk
Download example scene and tutorial